Dashboard
Smart Glocal Dashboard is a tool that allows you to track all transactions—payments, payouts, and refunds—across your Smart Glocal integrations.
Core features
In the Dashboard, you can:
- view the list of transactions and download transaction reports in CSV format
- find transactions using the date filter or AI search
- see the payout balances
Transaction list
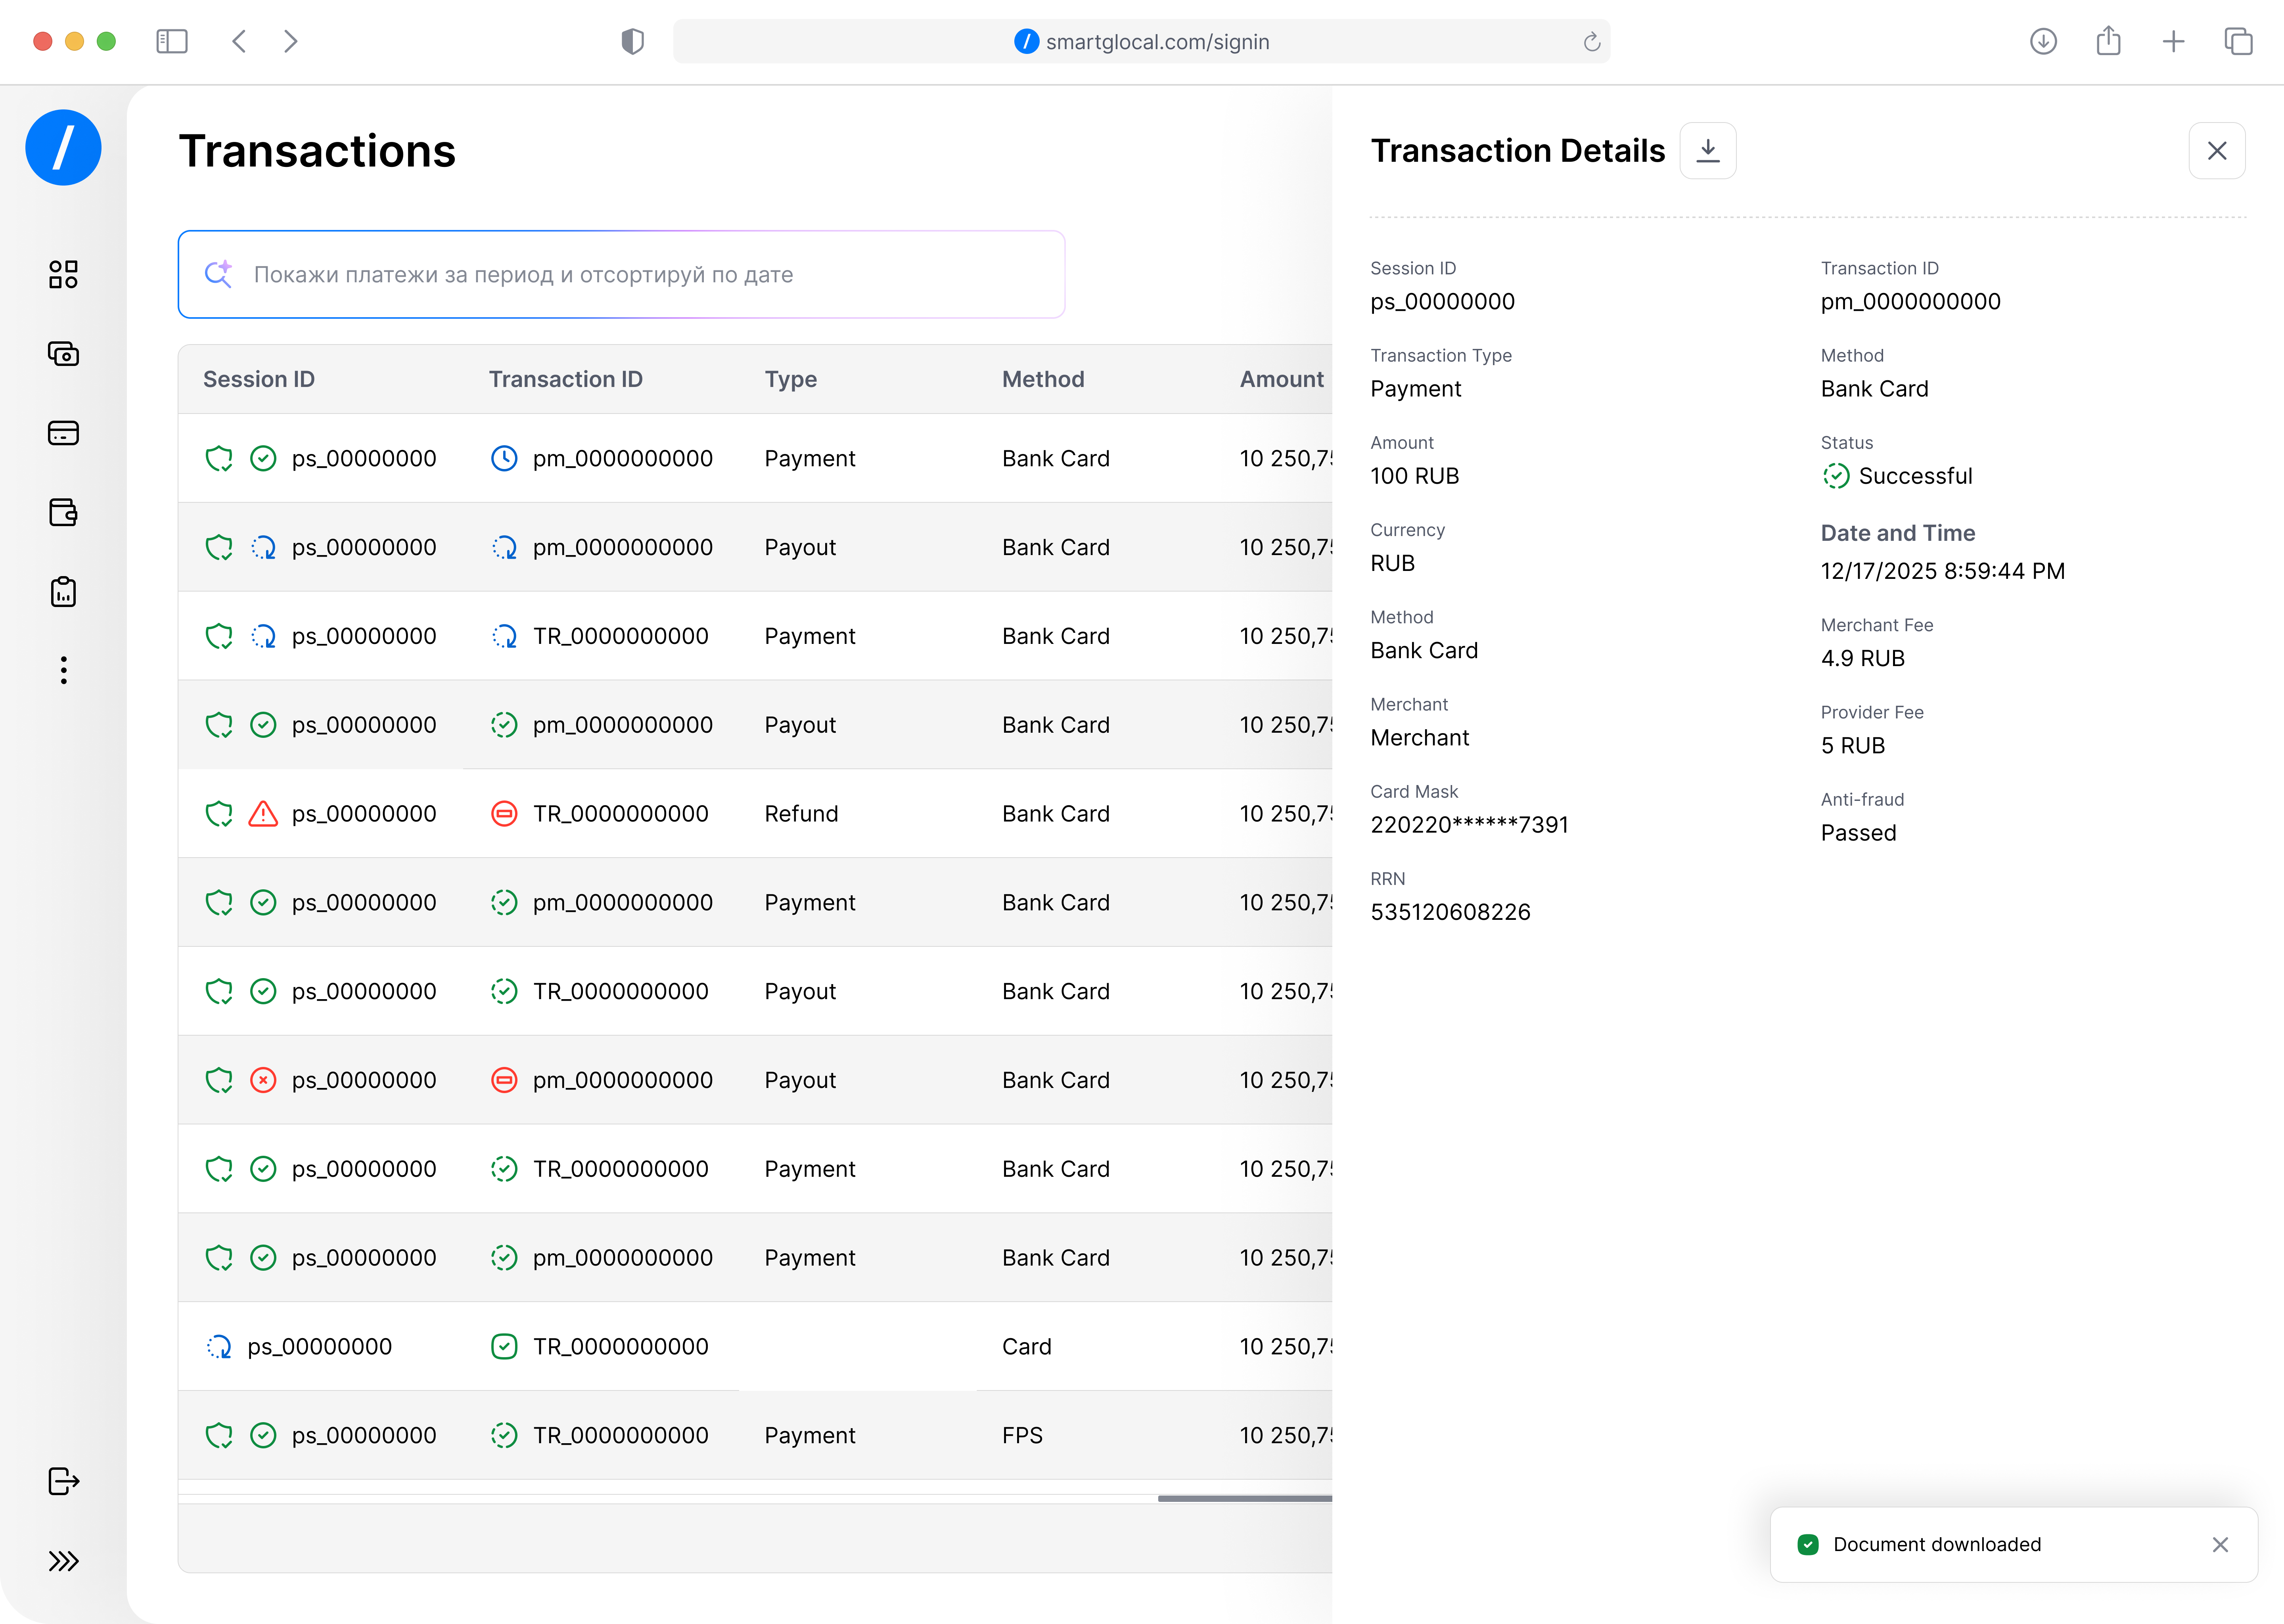
Click any row in the list to open a panel with the details of a specific transaction. The details include the following data:
- Session ID
- Transaction ID
- Type: payment, payout, refund
- Method: QR code, bank card
- Amount: transaction amount
- Status: transaction status (
succeeded,failed,pending,in_progress) - Date and time of the transaction creation
- Merchant: your company name
- Fee: amount withheld by the Bank for transaction processing
- Antifraud: service comment (
Passed,Failed)
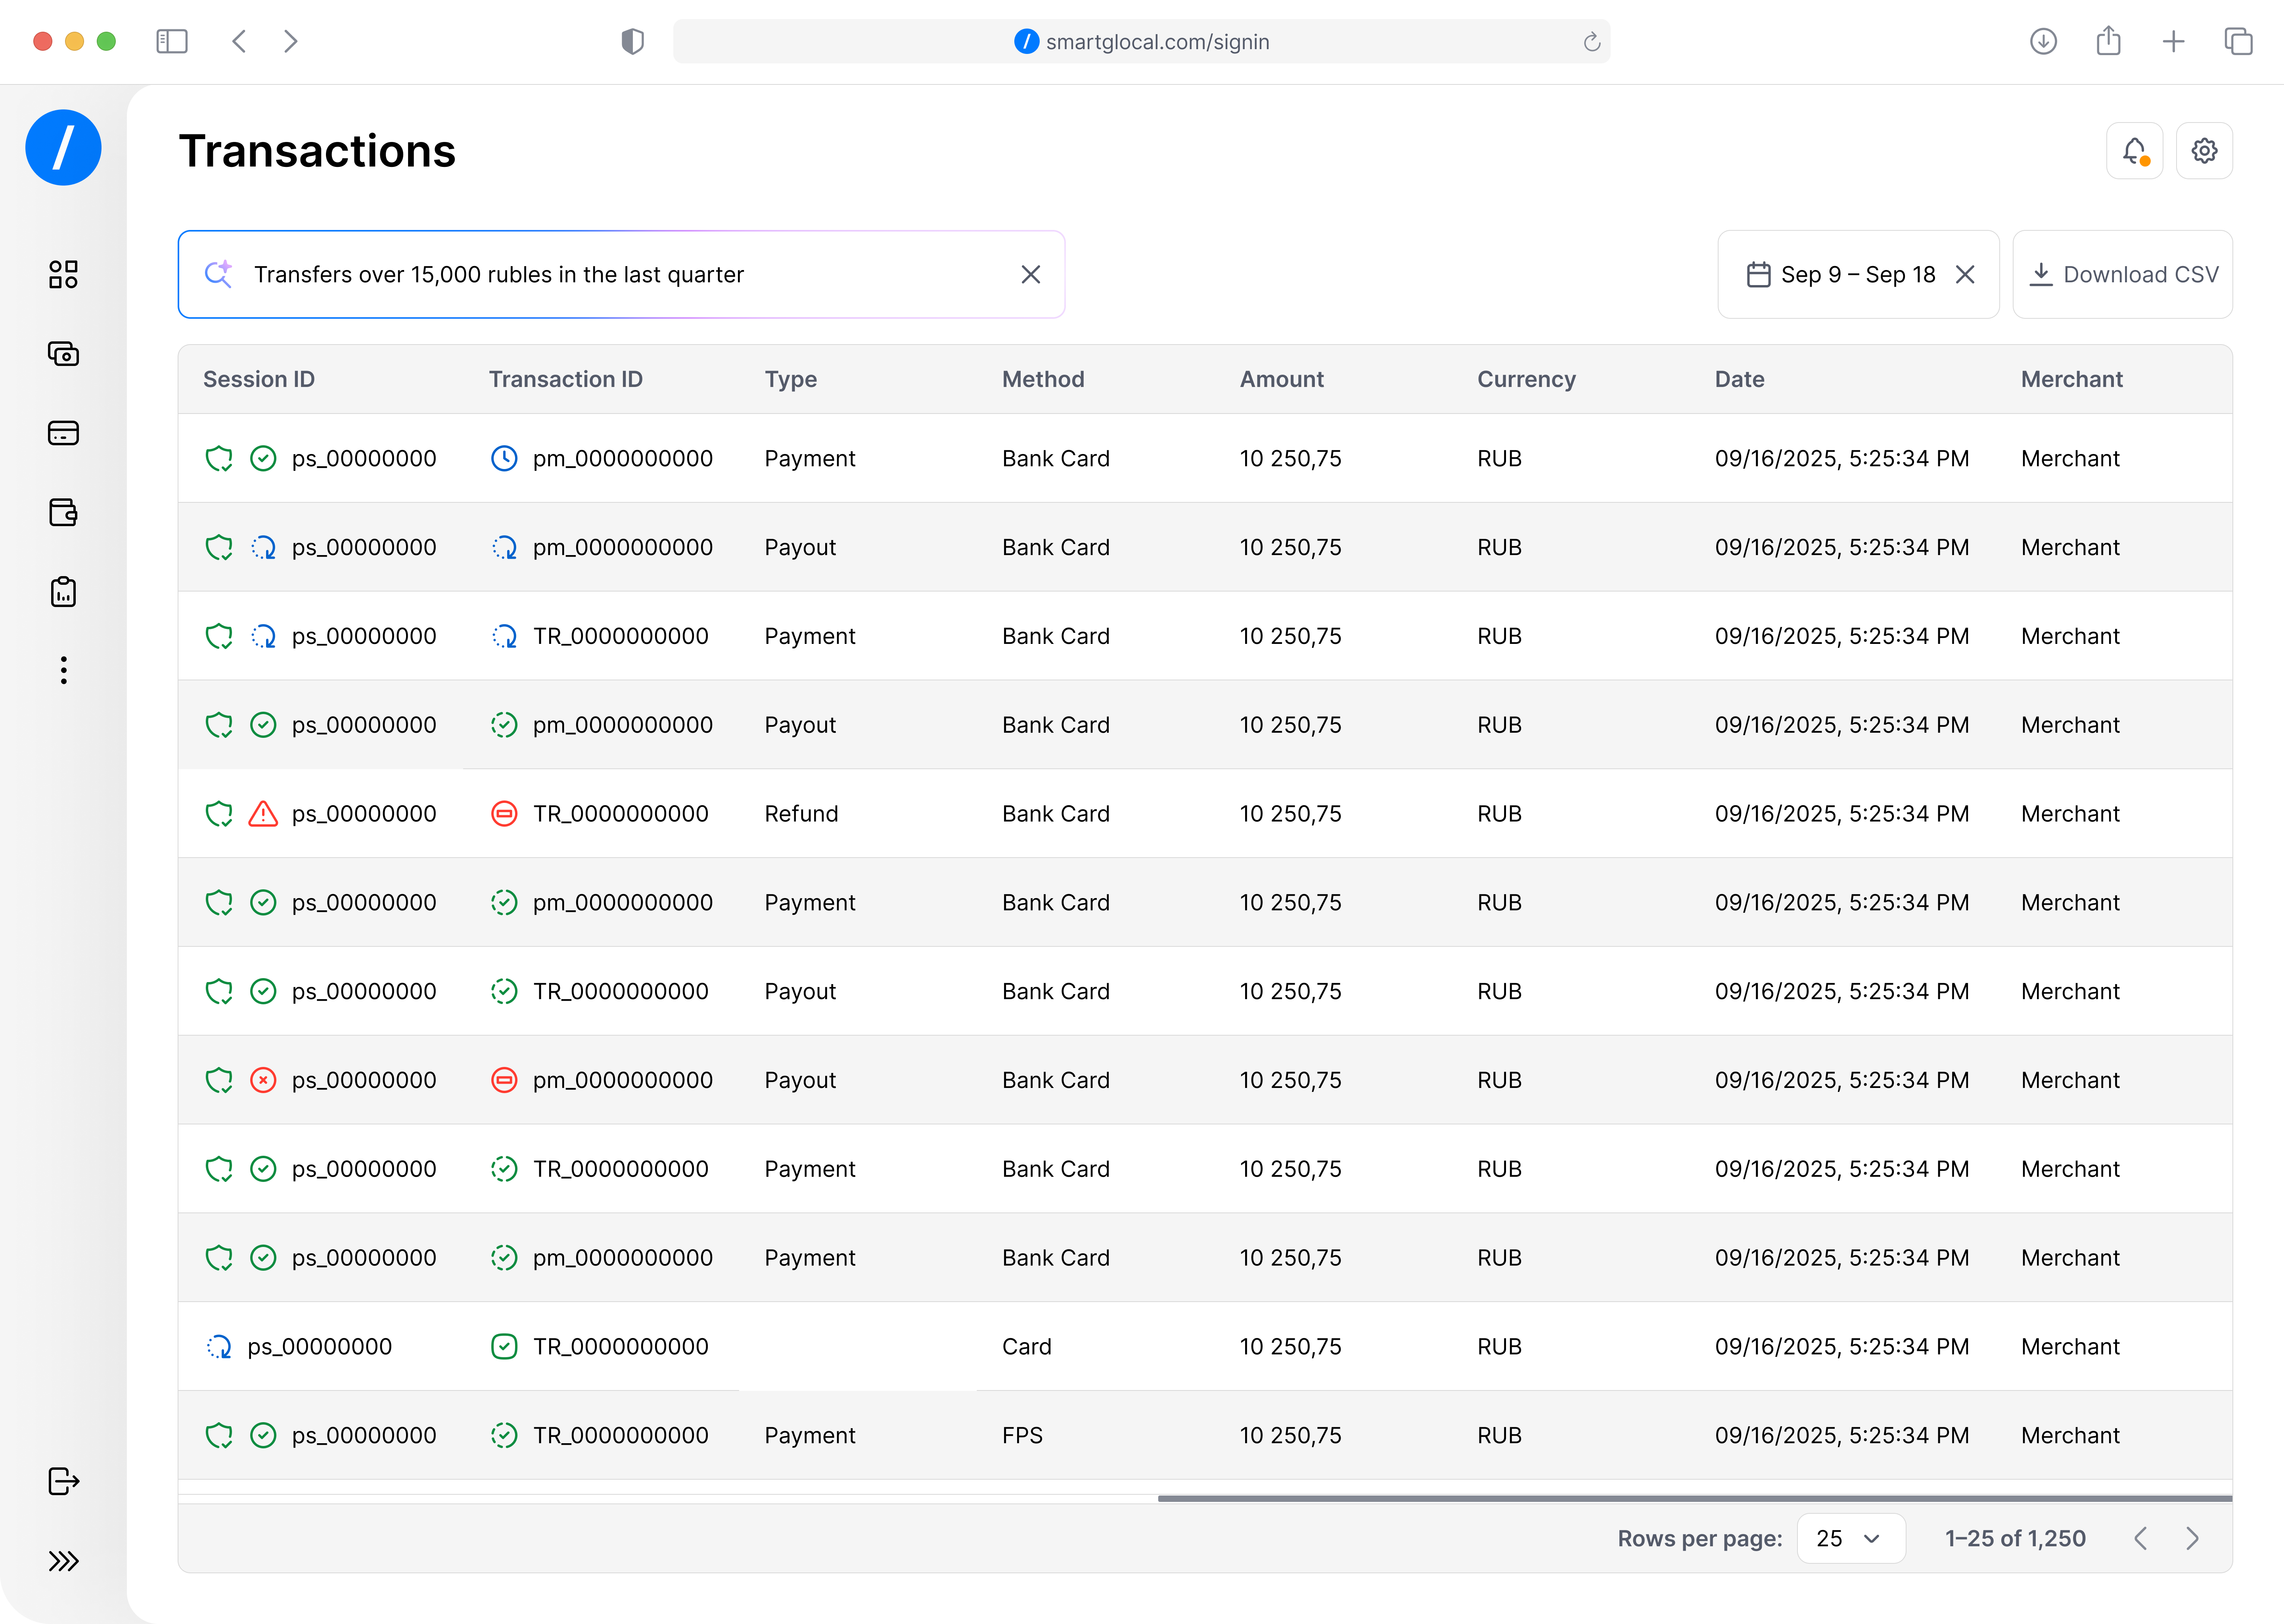
To download a transaction report for the filtered period in CSV format for further processing or for forwarding to your accounting department, click the Download CSV button in the top right corner.
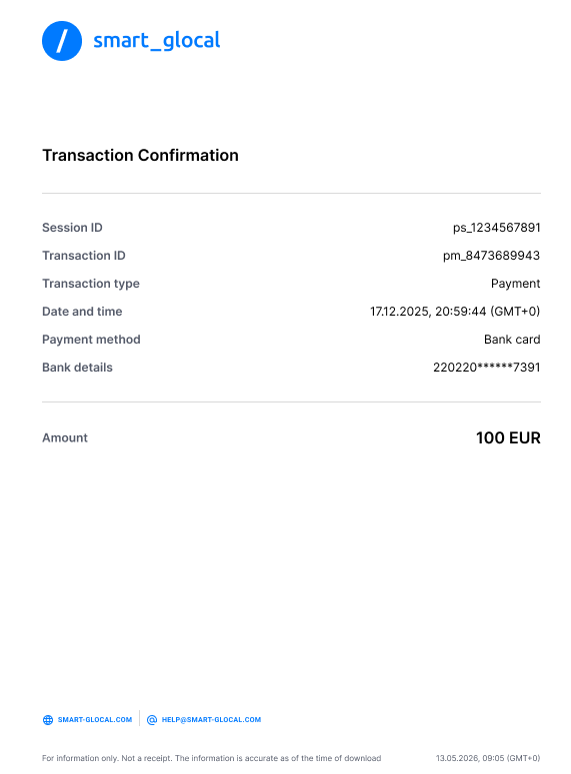
In the transaction card you can download a PDF receipt with the following details: masked card number, transaction date and time, status, type (payment, payout, or refund), and other data. You can provide it to your customers as an official confirmation upon request. The feature is already available for all transaction types—successful payments, payouts, and refunds.
Date filter and AI search
At the top of the transaction list, you will find a period filter. You can select 7 days, 30 days, 90 days, all time, or a custom UTC period.
You can also use our AI search: simply enter a query in the search bar and get the most relevant result. For example, you can enter "Transfers over 15,000 euros in the last quarter" in the search bar.
Payout balances
A payout balance is an amount that you can only spend on payouts to partners, clients, and contractors. To top up the payout account balance, please contact your Account Manager at Smart Glocal.
You can use a single account for all payout types or create a dedicated account for each type.
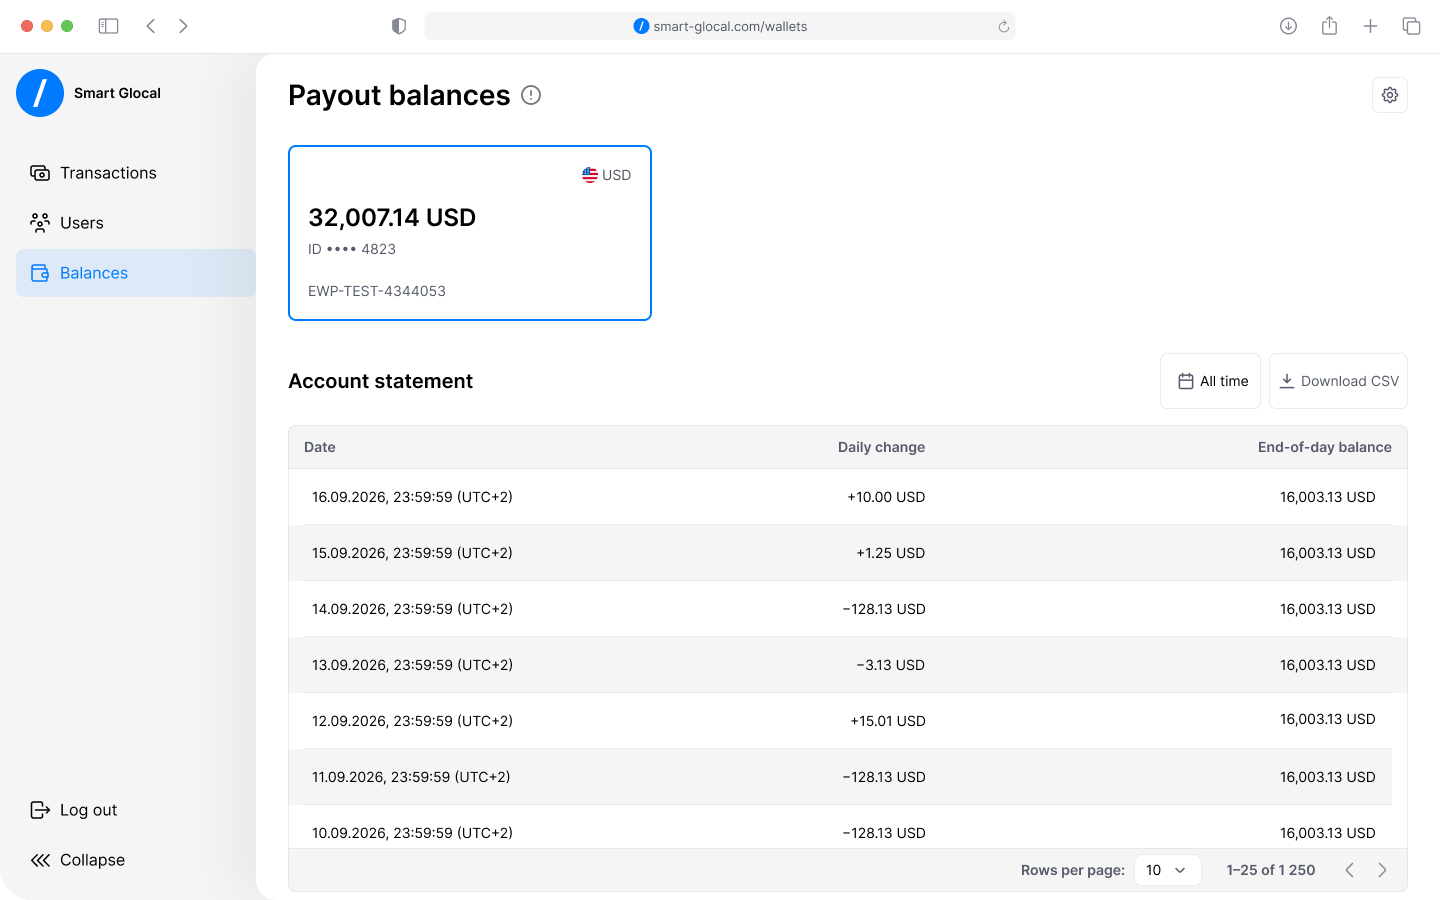
To view payout accounts, select the Balances section on the left panel. On the page that opens, you will see a carousel displaying all your payout accounts. When an account is selected, a statement for that account appears below.
How to get access
To get access to the Dashboard, contact your Account Manager at Smart Glocal. The access authorization document is signed by the company's director or Ultimate Beneficial Owner (UBO).
Once the document is signed, the director or UBO receives administrator access to the Dashboard. From there, the administrator can provide access for their employees in the following steps:
-
Open the Users tab in the Dashboard.
-
Send an invitation to an employee's email, selecting their role.
-
The employee receives the invitation, sets up their account, and logs in with the assigned role.
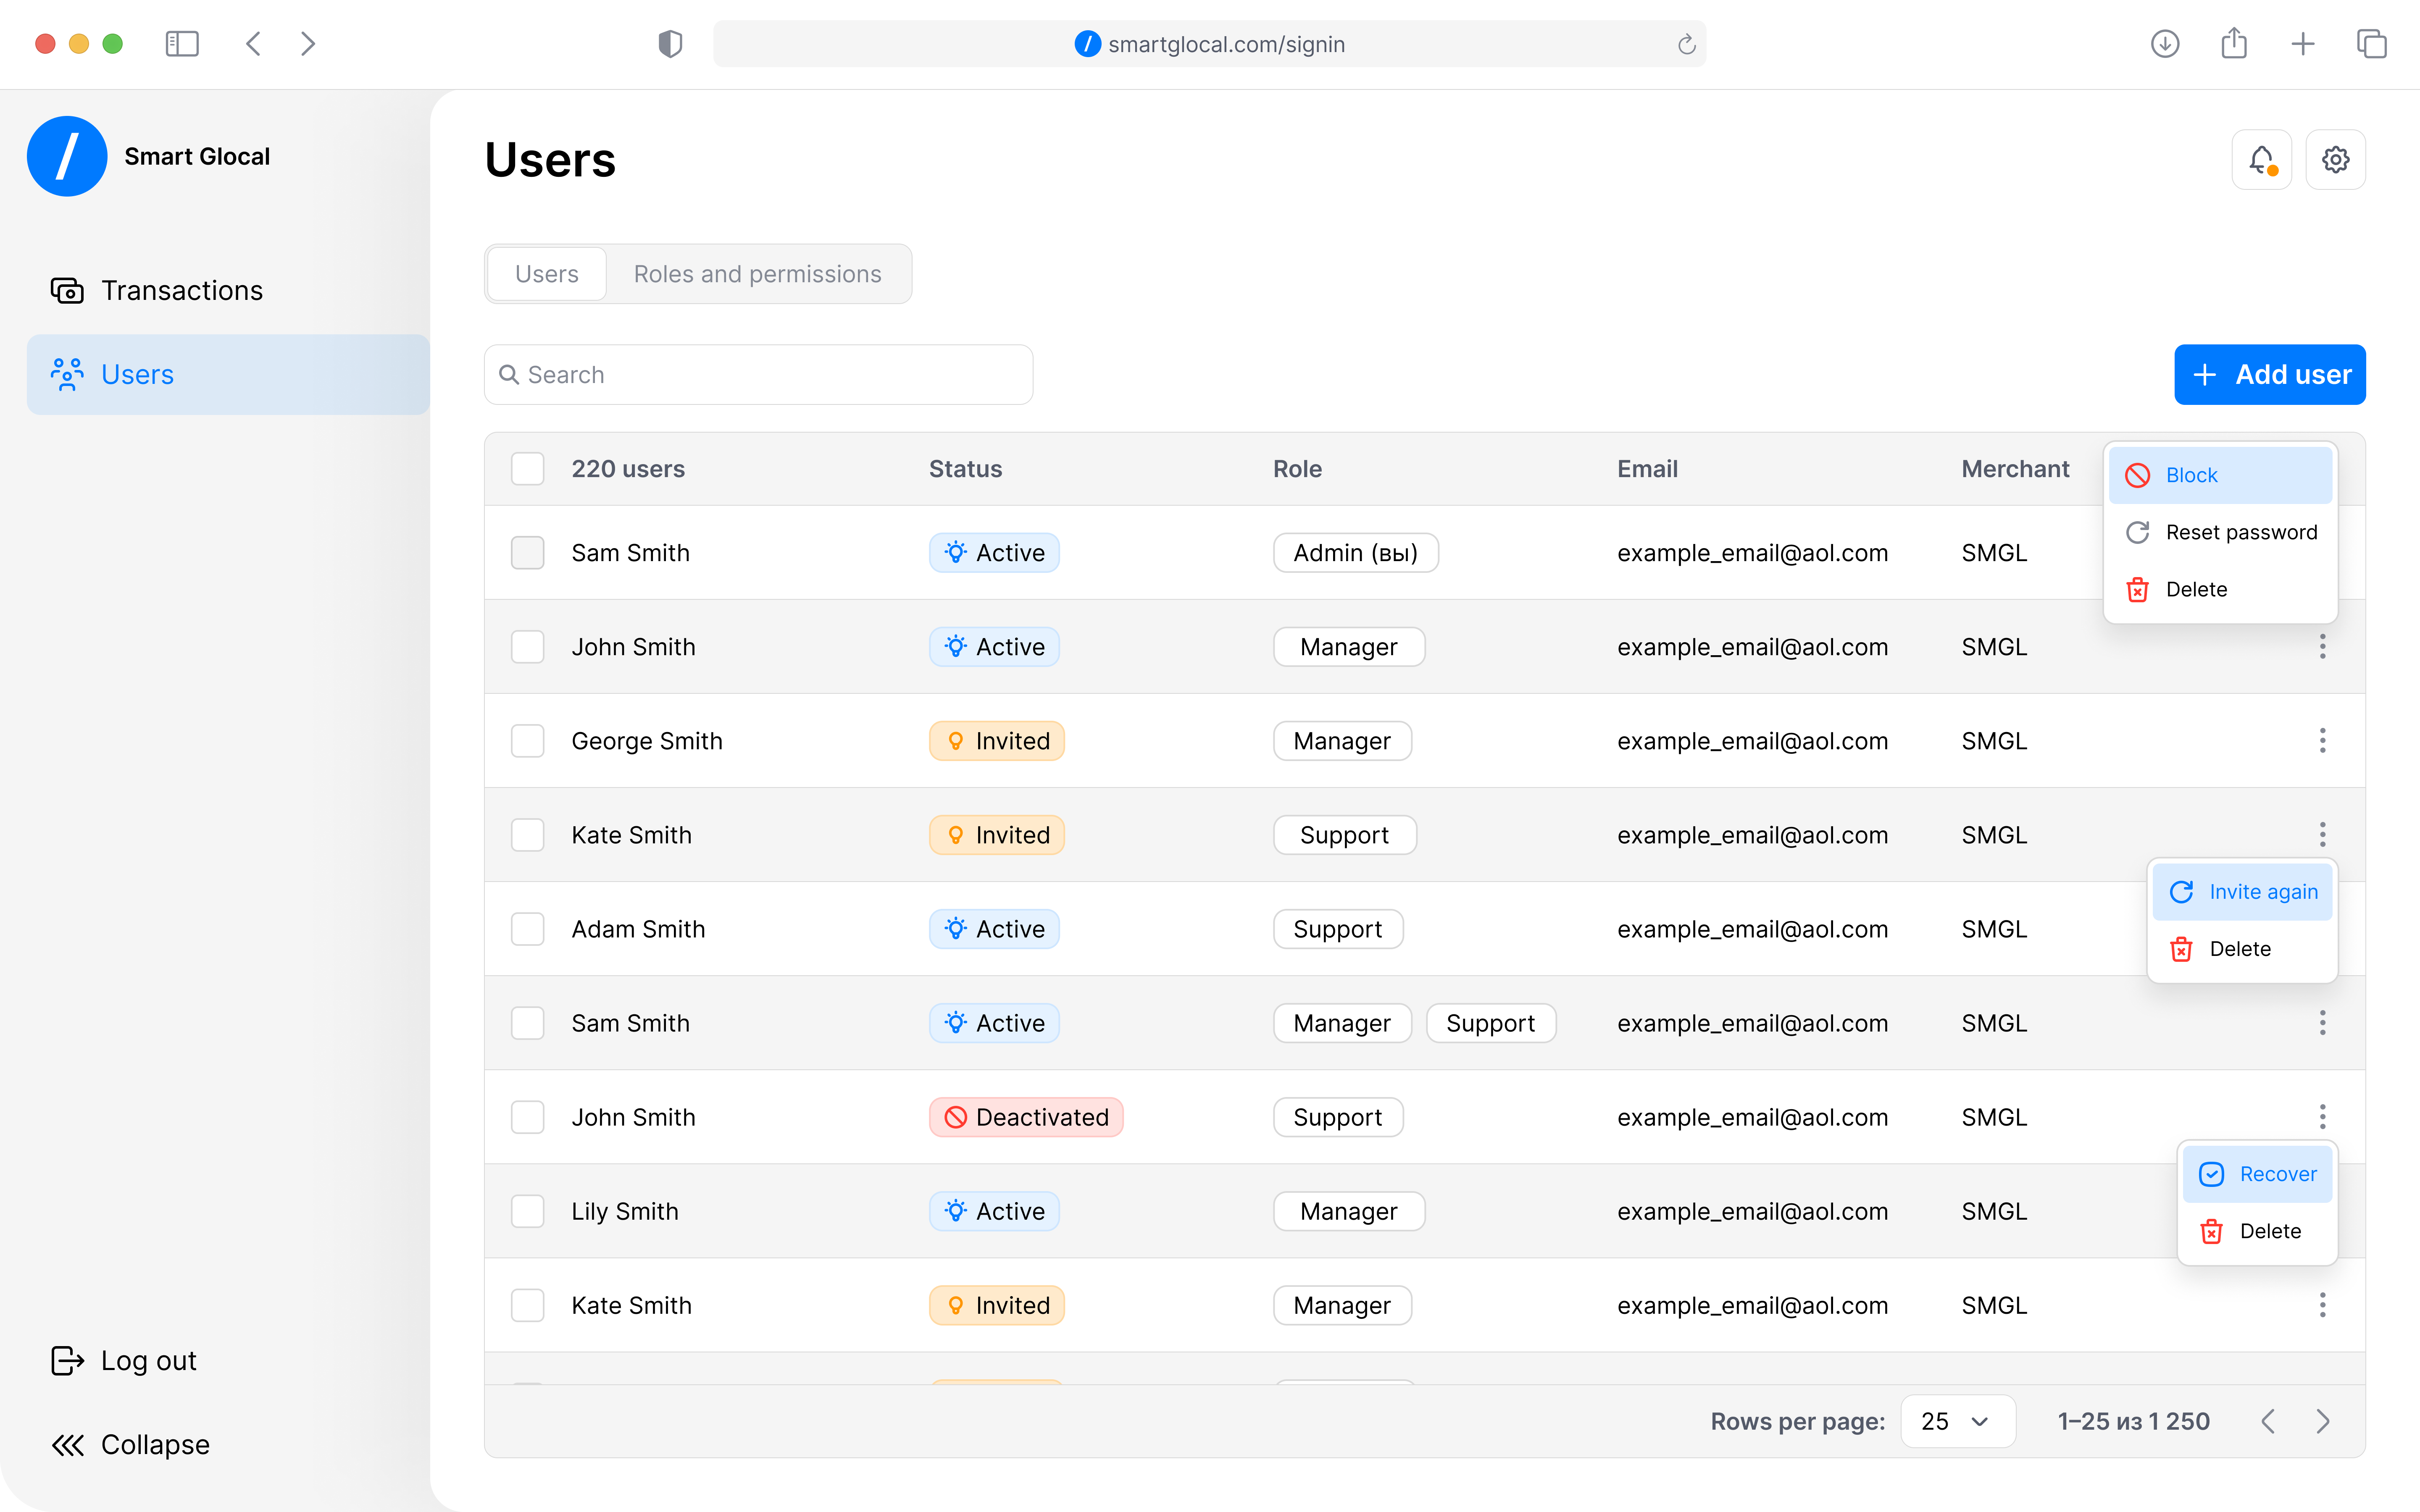
The Dashboard administrator will be able to to:
- add, re-invite, remove, or manage user accounts
- block, delete, and restore a user's access to the Dashboard
- reset a user's password if needed
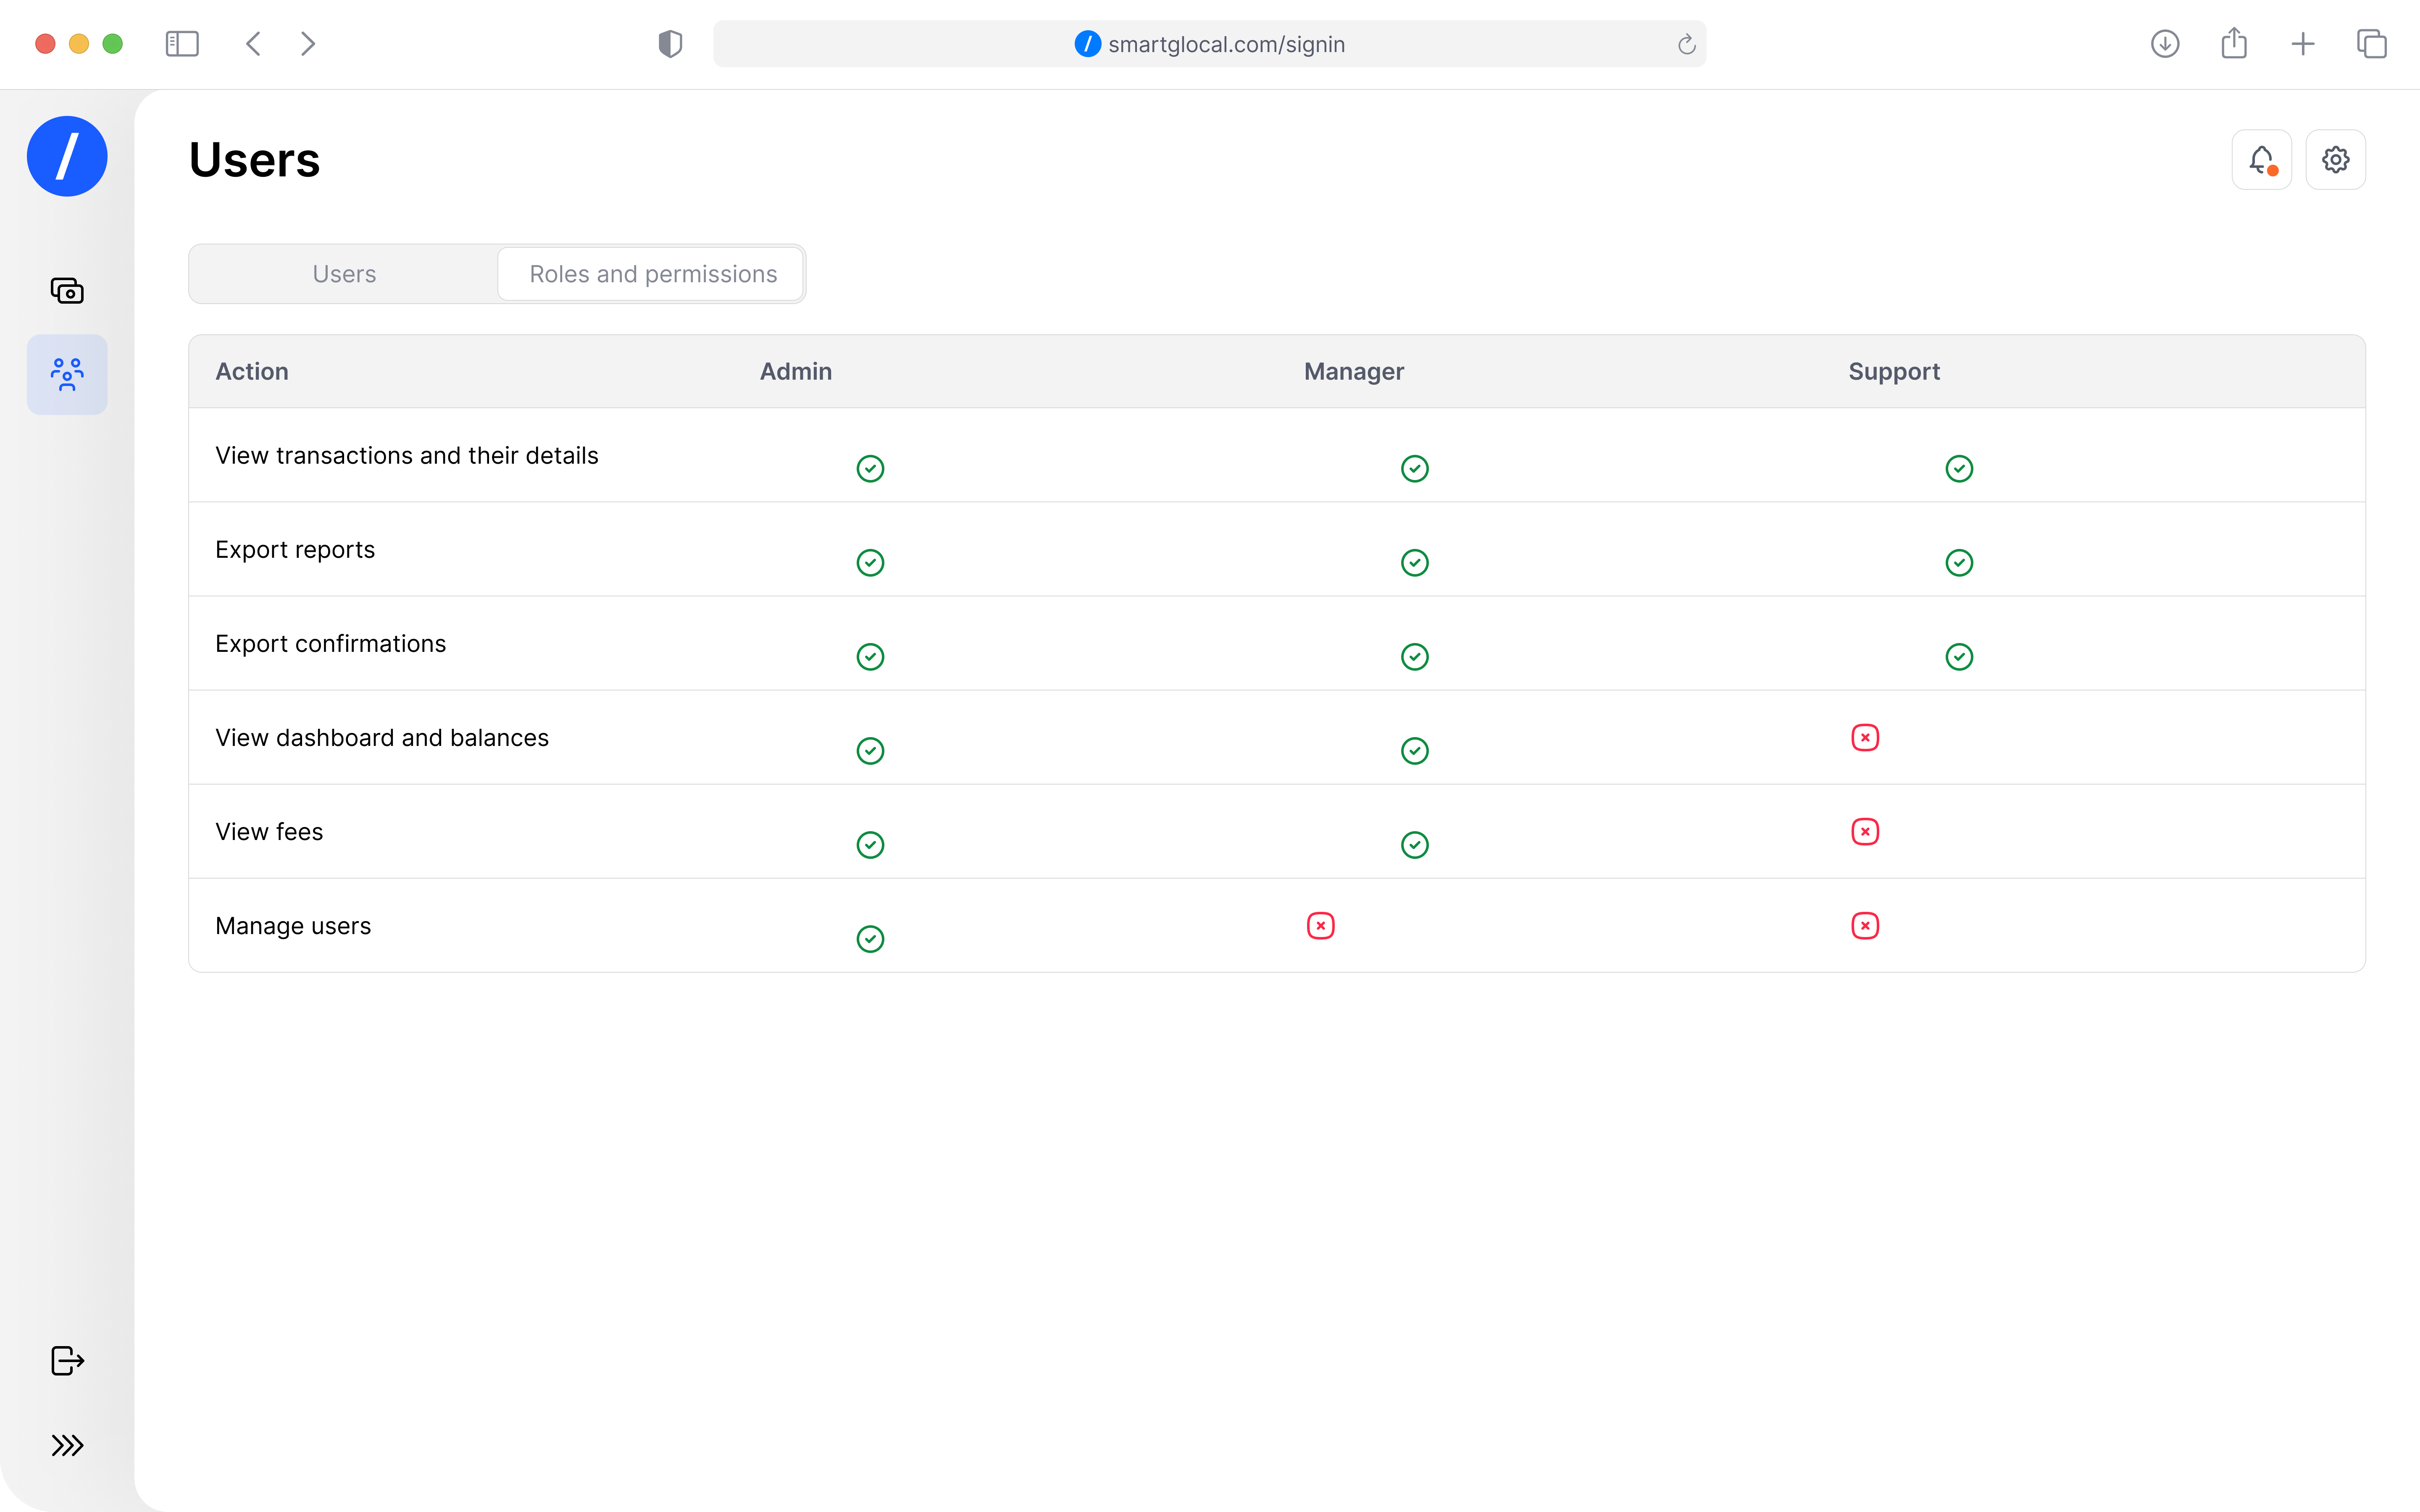
Permission matrix Below are the currently available roles, the list will be expanded as new functionality is added. You can assign multiple roles to a single user, as well as restrict their access to specific projects within the company.
How to log in:
- Wait for an email from Smart Glocal to your corporate email address provided during registration. The email will contain your first login credentials: login (your email) and temporary password (a generated character combination).
- Follow the link in the email.
- Upon first login, change the temporary password to a permanent one and complete two-factor authentication—it is mandatory for all users. 2FA protects your account even if your password is compromised—access is impossible without confirmation from your device.
For any questions regarding onboarding, please contact your Smart Glocal manager.