Widget for getting tokenized bank account details
The widget for bank account tokenization is used to save the bank account details on our side, while the token will be stored with you.
You add the widget to a page. Once the user fills in the bank account number, you will be able to retrieve the tokenized data.
You can find out information about a token using the
token/infomethod. The token's validity period is unlimited.
What the widget looks like
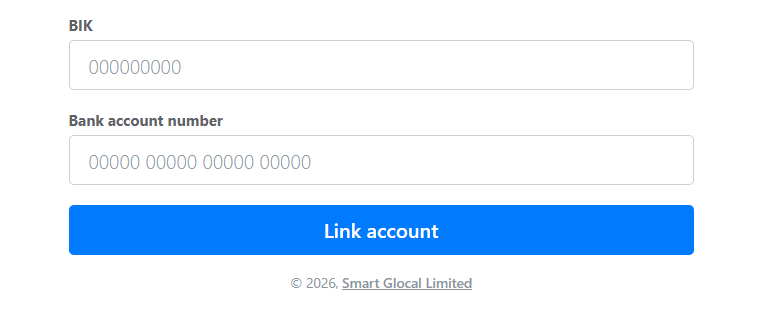
Code example: a page with the widget
<!DOCTYPE html>
<html lang="en">
  <head>
    <meta charset="utf-8" />
    <title>Widget for bank account tokenization</title>

    <meta name="viewport" content="width=device-width,initial-scale=1" />
    <meta name="format-detection" content="telephone=no" />

    <!-- Connecting script and widget styles -->
    <link href="https://widget-demo.smart-glocal.com/bank-account-tokenizer.css" rel="stylesheet" />
    <script src="https://widget-demo.smart-glocal.com/bank-account-tokenizer.js" defer></script>
  </head>
  <body>
    <main>
      <div id="smgl-bank-account-tokenizer"></div>
    </main>

    <script>
      document.addEventListener('DOMContentLoaded', function () {
        if (!window.SmglBankAccountTokenizer) {
          return;
        }

        const bankAccountTokenizer = new SmglBankAccountTokenizer(
          publicToken,
          {
            /*
            // An example of widget text settings.
            texts: {
              // Label field Account number. The default is "Bank account number".
              bankAccountLabel: '',
              // BIC field label. The default is "BIK".
              bikLabel: '',
              // Account linking button. The default is "Link account".
              submitButtonLabel: '',
              validationErrors: {
                invalidBankAccount: '',
                invalidBankAccountLength: '',
                invalidBikLength: '',
                isRequired: ''
              },
            },
            styles: {
              bankAccountTokenizer: {
                // Styles for the inline input field container.
                inputContainer: { background: 'cornsilk' },
                // Styles for the input field.
                inputField: { background: 'cornsilk' },
                // Styles for the input field when focused.
                inputFieldIsFocused: { background: 'white' },
                // Styles for the error input field.
                inputFieldIsInvalid: { background: 'red' },
                // Styles for the input field placeholder.
                inputFieldPlaceholder: { color: 'blue' },
              },
            }
            */
          }
        );

        bankAccountTokenizer.onReady = function () {
          console.log('Bank account tokenizer ready');
        };

        bankAccountTokenizer.onTokenizationStart = function () {
          console.log('Tokenization process started');
        };
        bankAccountTokenizer.onTokenizationFail = function () {
          console.log(
            'Tokenization process finished with an error',
            error
          );
        };
        bankAccountTokenizer.onTokenizationSuccess = function (result) {
          console.log(
            'Tokenization process successfully finished',
            result
          );
        };

        bankAccountTokenizer.render();
      });
    </script>
  </body>
</html>
How to add the widget to a page
To use the widget, you will need to connect our JavaScript library to the page and obtain a token (using the token method).
1. Link the scripts and styles
You need to link the widget's script and styles to the page.
<!-- In test environment -->
<link href="https://widget-demo.smart-glocal.com/bank-account-tokenizer.css" rel="stylesheet" />
<script src="https://widget-demo.smart-glocal.com/bank-account-tokenizer.js" defer></script>
<!-- For real operations -->
<link href="https://widget.smart-glocal.com/bank-account-tokenizer.css" rel="stylesheet" />
<script src="https://widget.smart-glocal.com/bank-account-tokenizer.js" defer></script>
2. Add a container with the widget
<div id="smgl-bank-account-tokenizer"></div>
3. Create an instance of the widget
After linking the script to the page, the SmglBankAccountTokenizer class will appear in the global scope.
To create the tokenization form, pass the public token created to work with the widget into the constructor.
const bankAccountTokenizer = new SmglBankAccountTokenizer('public token');
You can also pass settings for widget texts and styles for the input field to the constructor of the bank account tokenization form class.
const bankAccountTokenizer = new SmglBankAccountTokenizer(
    'public token',
    {
        texts: {
            // Label field Account number. The default is "Bank account number".
            bankAccountLabel: '',
            // BIC field label. The default is "BIK".
            bikLabel: '',
            // Account linking button. The default is "Link account".
            submitButtonLabel: '',
            validationErrors: {
              invalidBankAccount: '',
              invalidBankAccountLength: '',
              invalidBikLength: '',
              isRequired: ''
            },
        },
        styles: {
            bankAccountTokenizer: {
            // Styles for the inline input field container.
            inputContainer: { background: 'cornsilk' },
            // Styles for the input field.
            inputField: { background: 'cornsilk' },
            // Styles for the input field when focused.
            inputFieldIsFocused: { background: 'white' },
            // Styles for the error input field.
            inputFieldIsInvalid: { background: 'red' },
            // Styles for the input field placeholder.
            inputFieldPlaceholder: { color: 'blue' },
        },
    }
);
The following event handlers can be used to handle token receipt events:
bankAccountTokenizer.onReady = function () {
    // Handler for the form's readiness event.
};

bankAccountTokenizer.onTokenizationStart = function () {
   // Event handler that occurs when the tokenization process starts.
};

bankAccountTokenizer.onTokenizationFail = function () {
   // Event handler that occurs when the tokenization process fails.
};

bankAccountTokenizer.onTokenizationSuccess = function (result) {
   // Event handler for the successful completion of the tokenization process.
};
To display the form, call the render() method:
bankAccountTokenizer.render();
How to make a payout
Once you received the token, you can make a payout in a standard way.
Request example
curl -X POST \
https://demo.bank131.ru/api/v1/session/start/payout \
-H 'Content-Type: application/json' \
-H 'X-PARTNER-PROJECT: your_project_name' \
-H 'X-PARTNER-SIGN: signature' \
-d '{
  "session_id": "ps_3230",
  "payment_method": {
    "type": "bank_account",
    "bank_account": {
      "system_type": "ru",
      "ru": {
        "token": "3f03ee2580046153bb0aa859558e7ada10d3835270fdb4c4b70961239d37f31d",
        "full_name": "Ivanov Ivan Ivanovich",
        "description": "Money transfer"
        }
      }

  },
  "amount_details": {
    "amount": 10000,
    "currency": "rub"
  },
  "metadata": "good"
}'